For the reproduction of walls, roof surfaces, roadways, etc., various MoBa products are available, most of which have a surface structure. These include, for example, embossed or powder-coated plastic foils of various thicknesses, printed cardboard with laser or relief structure, special printed crepe paper, foils with 3D structure applied to a carrier fabric with quartz sand and rock flour, embossed metal foils, foam foils, etc., many of which also have a self-adhesive coating. For the sake of completeness, mention should be made of so-called embossing/road rollers, especially for road surfacing.
In addition to the different aspects, the different materials have advantages and disadvantages, both in terms of processing and durability. Especially when the system is used for a long time, subsequent changes cannot be ruled out. In my experience, there have been isolated cases over the years of considerable quality losses, e.g. colour changes due to a lack of UV resistance or the occurrence of chemical processes, the foamed street films became soft and even sticky and therefore completely unusable, therefore completely unusable, the surfaces crumbled, or the adhesive that was partially applied to the back of the material and initially adhered well changed over the years and caused the substrate to peel off (unless additional special bonding was carried out).
In contrast to the relatively easy processing of cardboard (simply cutting with scissors or a cutting knife), thicker plastic sheets are more demanding for the beginner without elaborate technical tools or much craftsmanship, especially when smaller components have to be processed or window gaps have to be cut (elaborate cutting, possible "deformation" of narrow component strips when cutting with a cutting knife, flared cutting edges, etc.). Cardboard, for example, is often thicker than other materials and therefore places special demands on the design of building corners, as the thickness of the material (unless mitre cuts are used) remains visible at the edge of the building without subsequent lamination (infill, colour overlay, etc.), which can lead to unattractive effects, especially on a small scale.
The fairway sheets often cannot be homogeneously adapted to the course of the curve (at the outer edge of the curve, depending on the material, a high expansion stress can occur, which impairs the shape of the fairway or prevents it from adhering to the substrate, while at the inner edge wrinkles are formed due to compression). This means that circular segments have to be cut, whose butt joints are visible in some road construction materials without the need for costly reworking.
These few examples show that special attention has to be paid to the choice of a suitable material before starting construction.
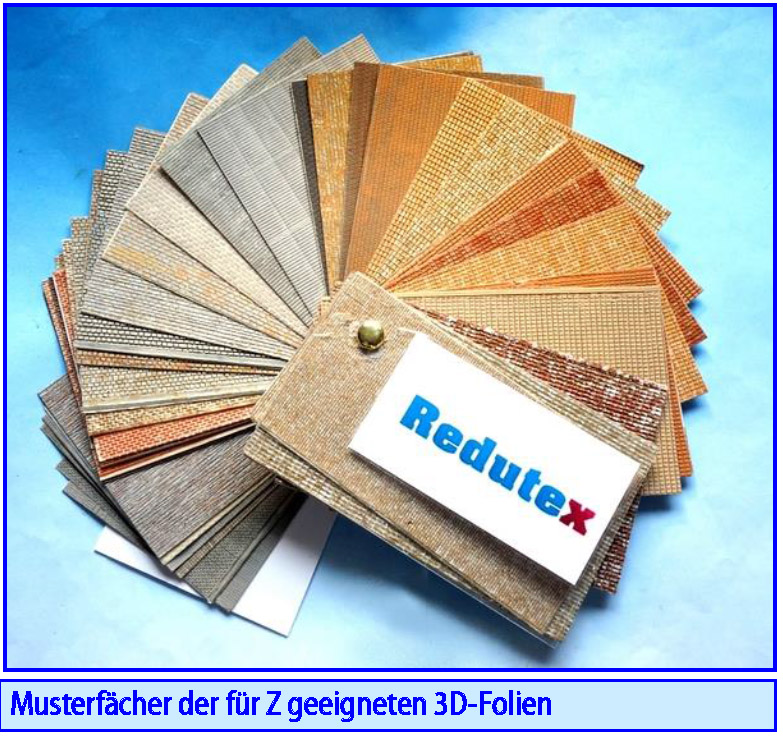
For the objects that I designed and built myself in my presentation model of the large-scale "Heri-lingen" depot in 1:220, I was looking for a material for the masonry, roof and roads that would be easy to work with even for beginners, but would have an authentic visual effect. After intensive research, I came across the so-called 3D sheets from the Spanish manufacturer Redutex.
The enormous number of structures offered in the common scales surprised me. Many of these foils are also suitable for Z-gauge, although they are specified for N-gauge.
The company's website gives an overview of the 3D foils it offers:
https://redutex.com/index.php?id_category=12&controller=category&id_lang=4
When I started building, there were only very few structures available in Germany, so I had them shipped directly from Spain. In the meantime, you can also buy a wide selection of sheets in Germany, for example from the 1zu220 shop of Jörk Erkel (HRT):
https://www.1zu220-shop.de/
As the Redutex 3D films convinced me in my previous projects in 1;220, I report on my personal experiences. From the objects I have realised so far, I have been able to obtain a complete picture of these structural films:
The films have a length of between 302 and 305 mm and a length of approx.
123 mm wide. Because the edges are more or less wide for production reasons, the usable structure surface essentially corresponds to the packaging specification of 300 x 120 mm. The films I used for the Z had a thickness of approximately 0.5 - 0.7 mm, depending on the structure used, including the adhesive layer and the protective film. The difference in thickness is due to the embossed structure, thinner masonry is thinner, tile structures are usually thicker. In H0, the foils are also up to 0.9 mm thick due to the greater embossing depth. The protective film of the adhesive lamination is approximately 0.05 mm thick.
The foils are delivered in a folding bag made of thin cardboard with information about the type of foil and the scale. The lower and upper pockets created by the folding are suitable for the organised storage of leftover parts for later use.
In the programme there are mullioned windows made of the same material, which already have a transparent layer on the back as an imitation of glass. The scale of these windows is also suitable for some Z-building projects (I have used them in the signal box), but the mullions are relatively wide compared to the laser-lasered cardboard windows. As the window sheets are very soft, they may only be suitable for ambitious modellers.
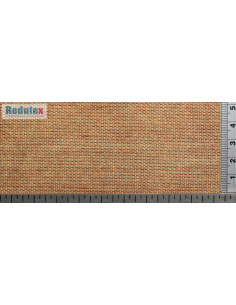
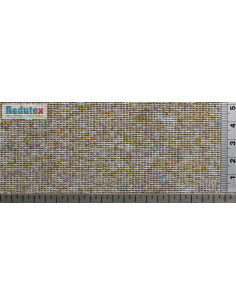
There are two main groups available, "standard" (monochrome) and "polychrome" (multicoloured). I have mainly chosen the polychrome version because the look is more vivid, the iridescent colouring seems more authentic and, especially in the 1:220 scale, it opens up the possibility of being able to correct small inaccuracies that may arise during construction by simply overlaying colours.
The surface structure is generally clean and crisp, as is the colouring. The appearance of the self-adhesive film is very realistic.
According to the manufacturer, the films are made of an acrylic resin according to the company's specifications, are EU-certified and, in accordance with EU regulations, do not contain any harmful or deleterious components.
One point seems important to me, especially for exhibition installations: according to the manufacturer, the films have a high fire resistance and can be considered "flame retardant". According to the manufacturer, the production is environmentally friendly.
I am unable to verify the above information, so this information only serves to complete the information according to the manufacturer's specifications.
Although many films are labelled as N scale, they are ideal for Z scale.
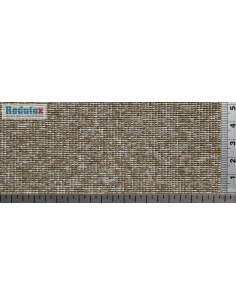
Example: the sheet type OFNM079 is offered for N. At a height of 10 mm, approximately 16.5 brick courses are pronounced, which corresponds to a course height of approximately 13.4 cm. This is higher than the usual "classic" masonry bricks in the original, with ca. 7 cm height + ca. 1 cm joint, but it looks more authentic than, for example, the facades of the old locomotive sheds in the Märklin program, whose masonry structure is coarser, with ca. 13.5 layers in 1 cm height.
I find it pleasing that, in contrast to the masonry structures of the locomotive sheds, the feet of the Redutex sheets are not as deep, thus creating a more homogeneous and realistic masonry structure.
In addition, the structure of the sheet is more prototypical, both in terms of the length of the bricks (in the plastic model, the bricks are too short) and the masonry connection, which is designed as a cross connection (i.e. with rows of binders and stretchers - see the yellow derivation in the photo).
As an additional object of comparison I show the Faller signal box (art. no. 120120) in 1:220 which I built, as well as a Schulcz embossed plastic plate for Z.
The direct comparison shows the amazing prototypicality of the Redutex sheet, both in terms of structure and colouring.
These examples show that some of the sheets designed for N gauge are also suitable for Z gauge.
In this context, the distance from which the viewer sees a building (usually from the edge of the track) must also be considered for the individual model. If too small a structure is chosen, there is a risk that from a greater distance the relative (small) scale structure will be barely perceptible (of course, other scales apply for show designs and photographs).
The roof sheet structure shown in the photo is clearly recognisable even from a greater distance; in the case of the brick structures shown, the realistic but very small structure may no longer be clearly perceptible from a greater distance.
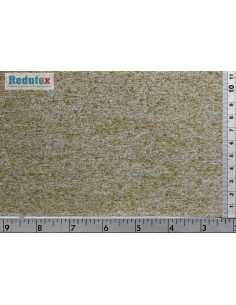
To illustrate this difference, I have superimposed a photo of structures OFNM079 and OFNM064, each with approximately 16 courses of stone at 10 mm height, and 148LD122 with approximately 12.5 courses of stone at 10 mm height. In buildings constructed with the sheet with the thicker unscaled stone layer thickness, the stone structure is likely to be more noticeable to the non-specialist observer. The more scale-oriented mobahner, who also wants to put his layout in the photographically correct light, will tend to go for the thinner structure, even at the risk that the (lay) observer will no longer perceive it as masonry from a distance.
In this respect, it will be possible to order the right structure for every model railway enthusiast from the wide range of sheets in the delivery programme.
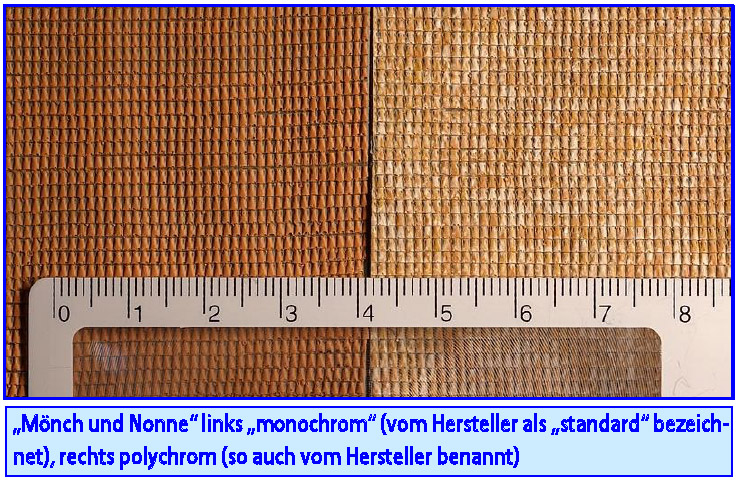
Tile sheets, which are available as classic roofing, but also as "monk and nun", for example, are also very suitable for the Z, even though they are specified as N.
A comparison with a Kibri plastic roofing sheet shows that, for example, the dimensions of the Redutex sheet shingles are almost identical to those of the Kibri sheet shingles.
Because I do not have a sheet of the same tile type as the Kibribuilding panel, I cannot make a direct comparison with the structuring. However, as I used a similar foil (only with a slightly different colouring) with the 160TT121, I can determine a natural-identical appearance of the roof surfaces of my realised buildings. Again: the appearance at extreme magnification in a photo is different when viewed with the naked eye, mostly more homogeneous and even, but not necessarily less realistic.
Due to the high flexibility of the foils, they are also very suitable for rounded components (rounded building edges, curved walls, etc.).
For use on curves in road construction, however, the situation is similar to that of other road films. Only marginal bending radii of film strips cut to the width of the road are possible, even pre-heating with a hairdryer does not improve the situation. In this regard, corresponding circular segments or triangular areas or, in the case of longitudinally oriented pavement structures, alternatively, several narrow strips that are laid side by side according to the curved course until the required road width is reached.
Occasionally, I observed small deviations in the pattern of the structure, which, however, did not cause me any problems in the small scale and in the sections which were therefore only required in smaller dimensions. In the meantime, the manufacturer informed me that the final quality control before delivery would be further improved, so that such films would not be sold.
About the processing:
I mainly concentrate on the processing of the foils, the basic principles of individual and functional model construction are described in detail in my e-books (https://bestagernet.de).
Elastic foils can be cut very easily with scissors or a cutting knife. Since cutting can be done more precisely with a cutting knife guided by a (steel) ruler, I have always opted for this variant.
Surfaces must be free of dust and grease and must adhere well. According to the manufacturer's instructions, cardboard, cement, wood, polyethylene foam, polyurethane, etc. are suitable.
Immediately after application, the film is still reversible, so that corrections can easily be made. According to the manufacturer, it should be possible to remove and replace the film even after a few hours, e.g. by heating it with a hairdryer. Permanent adhesion is said to occur after 24 hours.
In the last few months, I have not noticed any change in the durability of the bonding, even on critical narrow corner strips, e.g. around the edges. However, due to the short period of time, I cannot yet make a conclusive statement about the durability, but according to the manufacturer, the models have been in use for more than 12 years without any defects. Incidentally, the Hamburg Mi-WuLa also uses these sheets.
Unlike plastic or cardboard panels, which are usually sufficiently stable, the sheets require a stable substructure due to their flexibility. In the case of roads, this is usually the prepared subfloor. For my construction models I used thin cardboard (especially for the wall surfaces, where many window openings had to be cut out, sometimes with dotted folds) or balsa wood boards.
For the wall surfaces of the signal box, I could use the edge of the unstructured foil by cutting the foil in such a way that the edge is at the bottom of the façade and thus represents the plastered building base as splash protection (red arrows).
If a particularly stable base and a permanently accurate fit are required, I use balsa wood. The wood is finely sanded until it is smooth. To close possible pores and fine cracks, I sometimes apply an additional coat of acrylic paint. After drying and dusting, the foil is glued.
Thanks to the hardness of the substrate, the precisely cut ridges of the tent roof can be ideally joined. The elasticity of the foil is an advantage in this case, as the butt edges can be pressed tightly together, so that, if cut and processed cleanly, only a very thin joint is created due to the structured surface.
I glued the brick sheet for the arcade retaining wall onto a 1.5 mm thick balsa wood board.
The transformer house has a balsa wood substructure along its entire length.
In many models, special attention is paid to the edges of the building. This can be done with the foil in two ways:
(a) either the foil is pulled around the edge of the building (which works very well because of its flexibility, but with the disadvantage that the edge, especially on a small scale, is not sharp but slightly rounded. In this case, however, it is possible to carefully "resharpen" the edge by hand, tweezers or similar.
b) or bring the film to the edge and push the film on the other side of the wall close to the previous film. This will make the edge very sharp, but there will normally be a small visible edge in the thickness of the material. This narrow visible band can be matched to the surface colour of the film and, if necessary, the seams can be pre-pressed with a thin, hard metal strip (e.g. with the metal strip of the so-called sewing (file) strips).
In the larger gauges, going around the edges of the buildings will not be so problematic, in Z, however, the slight curvature is more noticeable only in the photos that show everything mercilessly, to the naked eye rather less.
Due to the flexibility of the sheets and thus a certain "softness", narrower strips can be cut very well. For example, the strips for the side edges of the transformer house pillar ledges are only 1 mm wide. The ledge overhang above the ground floor is also about 1.5 mm high.
This means that narrow strips the width of a roof tile can be cut from the "monks and nuns" structures and glued together as ridge and hip tiles.
In road construction it is also possible, even in Z, to cut only individual "stones" to represent, for example, a decaying paved (field) area.
In this context, however, it should be mentioned that with smaller components in the millimetre range, the protective film of the adhesive layer must be carefully removed, e.g. with the tip of a cutting knife pushed underneath, because otherwise there is a danger of the adhesive layer lifting off the film in these very small areas.
In summary, I consider the Redutex 3D films to be very suitable for a wide variety of model building projects, both because of the huge selection of different structures, the realistic three-dimensional, but not strongly accentuated appearance, the nature-identical colouring and, in particular, because they are very easy to use, even for beginners. The objects that I have already realised and presented to the model railway scene have so far received a consistently positive response. I will now be using the sheets more and more in my projects.
By Heribert Tönnies


Comments (0)